
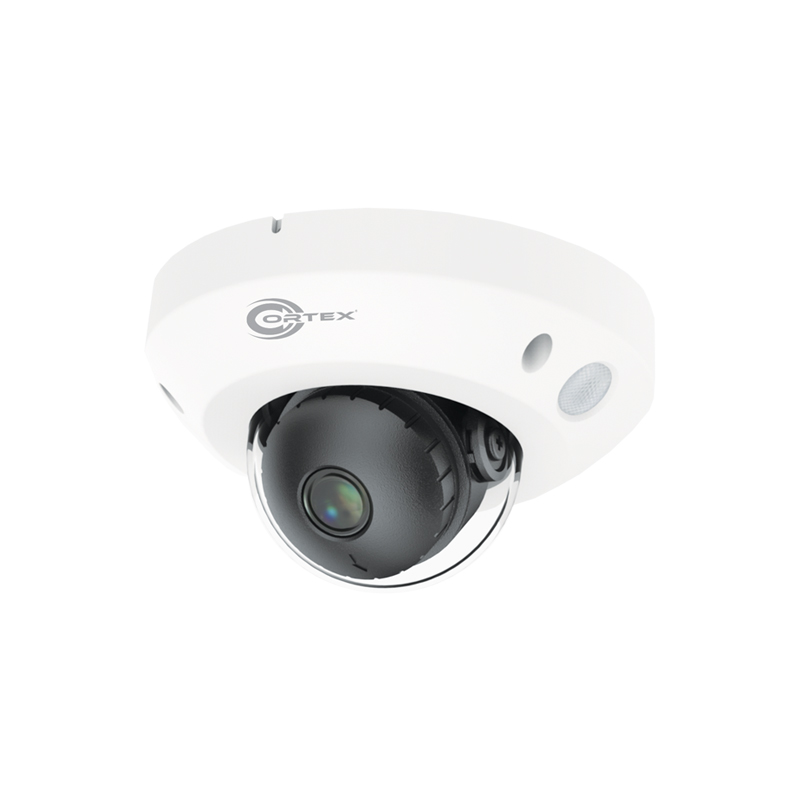
Vandal Dome Camera: A Reliable Choice for High-Risk Areas
A vandal dome camera is a type of CCTV camera designed to resist tampering and physical impact. Its compact, rounded housing helps protect the camera from attempts to knock it out of position, damage its lens or interfere with its operation. These cameras are commonly used in places where security equipment may be exposed to accidental knocks or deliberate vandalism.
What Is a Vandal Dome Camera?
A dome camera is named after the curved cover that encloses the camera. In a vandal-resistant model, this cover and its housing are built to withstand a greater level of impact than those of a standard camera. Depending on the model, the dome may be made from toughened material, while the base and mounting points are designed to make the unit harder to remove or tamper with.
Vandal resistance does not mean that a camera is indestructible. The level of protection varies between products, so it is important to check the manufacturer’s specifications before selecting a camera for a particular site.
Where Are Vandal Dome Cameras Used?
Vandal dome cameras are suitable for indoor and outdoor locations where cameras may be within reach or exposed to impact. Common applications include:
- Entrances, corridors and stairwells
- Schools, colleges and public buildings
- Retail shops, shopping centres and car parks
- Transport hubs and passenger areas
- Warehouses, factories and loading bays
- Lifts and other shared spaces
The right camera depends on the risks at the site, the viewing area and the environmental conditions.
Key Features to Consider
Impact-resistance rating
Some cameras are tested and assigned an IK rating, which indicates their resistance to mechanical impact. A higher rating generally means greater impact resistance under the test conditions. Check the rating and the testing standard stated by the manufacturer, and match it to the expected risks at the installation site.
Weather protection
For outdoor use, look for an appropriate IP rating. This indicates protection against the entry of dust and water; it is separate from the IK rating for impact resistance. Also consider temperature limits, exposure to direct sunlight and the possibility of water collecting around the mounting point.
Image quality and field of view
Choose a resolution and lens that can capture the detail required for the location. A wide field of view can cover a larger area, while a narrower view may provide more detail at a specific point, such as a doorway or counter. Camera placement is just as important as resolution.
Night-time performance
If the area is poorly lit, consider a camera with suitable low-light performance or infrared illumination. Dome covers can sometimes cause reflections or glare, particularly if infrared light reflects off the inside of the cover. Correct installation and a clean, properly fitted dome help reduce this risk.
Mounting and cable protection
A robust camera can still be vulnerable if it is loosely mounted or its cables are exposed. Use suitable fixings for the mounting surface, secure the housing properly and protect cables from tampering where possible.
Benefits of a Vandal Dome Camera
- Greater resistance to tampering: The protective housing can help reduce damage from knocks and deliberate interference.
- Discreet appearance: The dome design blends into many indoor and commercial environments.
- Flexible positioning: Many models can be adjusted during installation to cover the required area.
- Options for varied environments: Models are available with features for indoor, outdoor, low-light and networked surveillance applications.
Installation and Maintenance
Before installation, identify the areas that need monitoring and check for obstructions, backlighting and blind spots. Mount the camera at a suitable height, angle it towards the intended area and ensure that the fixings and cabling are secure. For outdoor installations, follow the manufacturer’s guidance on sealing and weather protection.
Regular maintenance should include checking the camera’s position, cleaning the dome with a suitable non-abrasive cloth, inspecting the housing and confirming that the recorded image is clear. Avoid harsh cleaning products that may scratch or cloud the cover.
Choosing the Right Vandal Dome Camera
When comparing models, consider the installation environment, required impact and weather protection, image detail, night-time performance, storage and network compatibility. It is also useful to check whether the camera supports the recording system already in use and whether it requires professional installation.
A vandal dome camera can be a practical part of a CCTV system in areas where ordinary cameras may be at greater risk of damage. Selecting a model with suitable ratings and installing it correctly can help provide dependable surveillance for the site.
7 Essential Tips for Installing and Maintaining Vandal-Resistant Dome Cameras
- Choose an IK10-rated vandal-resistant dome camera.
- Mount it high and out of easy reach.
- Use tamper-resistant screws and secure brackets.
- Aim the camera before tightening the dome cover.
- Clean the dome with a soft, lint-free cloth.
- Check for glare, reflections, and night-vision issues.
- Inspect the housing and seals regularly for damage.
Choose an IK10-rated vandal-resistant dome camera.
Choose an IK10-rated vandal-resistant dome camera for locations where the equipment may be exposed to deliberate tampering or accidental impact. IK10 is the highest rating in the IK impact-protection scale and indicates that the camera enclosure has been tested to withstand a specified level of impact. Check the manufacturer’s certification and ensure the camera is also suitable for the site’s other conditions, such as rain, dust and temperature changes.
Mount it high and out of easy reach.
Mount the vandal dome camera high enough to keep it out of easy reach, while ensuring it still captures a clear view of the area. A suitable position can make tampering or damage more difficult and help protect the camera, its housing and cabling. Avoid mounting it so high that important details become difficult to identify, and check the viewing angle for obstructions and blind spots.
Use tamper-resistant screws and secure brackets.
Use tamper-resistant screws and secure brackets when installing a vandal dome camera to make it harder to loosen, remove or reposition. Choose fixings that suit the mounting surface, and ensure the bracket is firmly secured and the cables are protected from access. This helps keep the camera in the correct position and reduces the risk of tampering.
Aim the camera before tightening the dome cover.
Aim the vandal dome camera carefully before tightening the dome cover. Adjust the lens to capture the required area and check the live view for blind spots, glare or obstructions. Once the framing is right, secure the cover firmly as instructed by the manufacturer, taking care not to shift the camera or over-tighten the fixings.
Clean the dome with a soft, lint-free cloth.
Clean the vandal dome camera cover regularly with a soft, lint-free cloth to remove dust, fingerprints and smudges that can affect image clarity. Wipe gently, and avoid abrasive materials, strong cleaning chemicals or excessive pressure, as these may scratch or damage the dome.
Check for glare, reflections, and night-vision issues.
When installing a vandal dome camera, check the live view in both daylight and darkness to identify glare, reflections or night-vision problems. Light reflecting off the dome cover, nearby windows or shiny surfaces can obscure important details, while built-in infrared illumination may bounce off the cover and create a hazy image at night. Adjust the camera’s position, angle or lighting, and keep the dome clean to help maintain a clear picture.
Inspect the housing and seals regularly for damage.
Inspect the vandal dome camera’s housing and seals regularly for cracks, loose fittings or signs of wear. Damaged seals can allow dust or moisture to enter, potentially affecting image quality and camera performance. Clean the cover gently with a soft, non-abrasive cloth, and arrange repairs or replacement if any damage is found.